Are you looking to build your own speakers and wondering how to start or what things you should be looking out for? Building your own speakers is probably one of the most rewarding DIY projects available. There is an abundance of choice in every step to suit your level of skill, as well as your budget. If however you want to buy a high-quality speaker then Outeraudio is a great place to go.
Once you’ve completed your first set, you’ll understand the immense immediate gratification that comes when listening to them for the first time. Not only that, but every time you listen to your speakers in the future, you’ll be reminded of the fun you once had building them yourself too.
Getting started, the very first thing you need to do is decide on how you plan to build your own speakers. This choice largely depends on your level of skill, your budget, as well as how much you time you want to put into the project. There are three options to choose from – a speaker building kit, using speaker building plans, or a completely DIY project with everything designed yourself. Below we will look at each option and expand on what it involves to help you make the best choice to suit you.
Option 1 – Speaker Building Kits
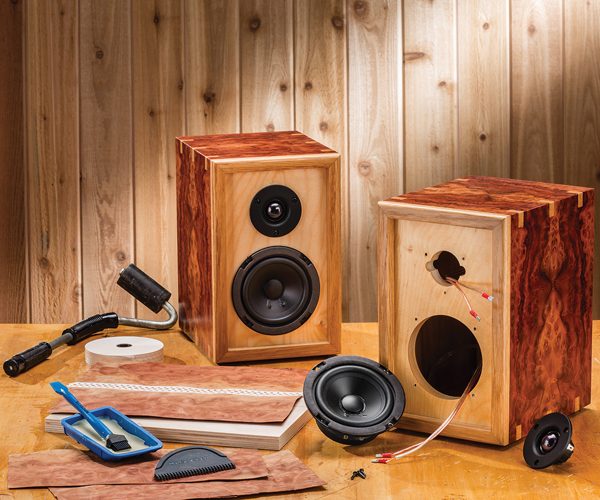
Speaker building kits are a great choice for first-time speaker builders. Within this option, there are actually a few choices too. Some kits come with just your drivers, other kits come with your drivers plus your crossover components. Alternatively, you can get a kit that comes with everything, your drivers, crossover components as well as the wood for the enclosure. You’ll still learn a lot by using speaker kits, they just help to keep you on the right path and avoid spending more money than you need to on unnecessary parts which you might not end up using. As said, if you’re very new to speaker building, this option is a great place to start.
Option 2 – Speaker Building Plans

Speaker Building Plans are a great compromise between a kit and doing it all yourself (complete DIY). The plans will give you a guide so that you know your speakers will still sound good, but you’ll also have the freedom and flexibility to incorporate your own design too.
Option 3 – Design and Build Everything Yourself (Complete DIY)
As mentioned earlier, one of the biggest determining factors for which build option you chose, is budget. If you’re on a tight budget but you want decent sounding speakers when you’re done, then a kit is probably the best way to go. However, if you’re more focused on the design and how speakers work and you’re willing to put the time and money in, designing your speaker from scratch is the best choice for you! You’ll learn a lot along the way and even if you mess up, it’s easy to correct your errors and continue on. Be prepared to make mistakes and be prepared for some things not to go quite how you planned. But also, be prepared for a huge amount of gratification once completed!
Below is a step-by-step guide to designing and building your speakers yourself:
Step 1: Choose your enclosure type.
The first thing you need to choose is between a sealed enclosure or a ported enclosure. A sealed enclosure is easiest, while a ported enclosure is a bit more complicated. Sealed enclosures reproduce low frequencies more accurately than ported ones and are generally smaller and easier to build because there is no port to tune.
Step 2: Choose a crossover type.
Here, you can decide between 2-way, 2.1-way, 3-way,3.1-way, 4-way, or just skip crossover altogether and go with a full-range speaker instead. First decide on how much of the frequency spectrum (from 20Hz to 20kHz) you’re wanting to use and how you’d like to split it. A 2-way crossover is a great place to start. Split two ways, the woofer will cover the lower frequencies and a tweeter will cover the higher ones. With this step, the complexity as well as cost, will increase with the amount of ways you split the frequency.
Step 3: Choose your drivers.
There are a lot of factors which determine which drivers to use for your speakers. The biggest factor is determined by what crossover type you chose in step 2. If you chose a 2-way crossover system, you’ll need a tweeter for the highs but one that can also reach into the lower-highs as well. This allows you to crossover into a woofer for the mid-range and lows. Check out your driver sheets to see what frequency the drivers are designed for before you decide.
Step 4: Design your enclosure.
When designing your enclosure, either use an online calculator to determine the best size and dimensions for your enclosure or use modelling software. Use the feel small or TS parameters found on your driver data sheet and enter those into the software. The software will give you approximation of how the drivers will sound or perform within various sizes of speaker enclosures.

Step 5: Design your crossover.
You’ve got two choices here, pre-designed or design it yourself. There are a lot of great pre-designed crossovers available. Find where you need to crossover your speakers and then find a pre-made crossover that gets you as close to your crossover point as possible. Crossover design can be very complex, but if you would like to learn how it all works then I strongly suggest making your own! This is where the heart of speaker design lives to if you really want to learn how good speakers are designed, this is the area to learn that!
A useful tip is to keep your crossovers outside of your enclosures or in a spot that’s easily accessible. This allows you to tweak and change your crossovers once you’re done with the speakers and see what that does to the sound.
Step 6: Build your enclosure.
This is probably my favourite part of the entire project. First you need to decide on what type of wood you’d like to use for your enclosure. MDF quality plywood or pine are great choices to use. Generally, I find dense, hard woods or ply woods tend to sound better than softer woods.
Step 7: Test your speakers.
Lastly, before closing everything up make sure everything is working properly. Get your drivers and crossovers into the cabinet, wire everything together, and see how they sound! If you need to adjust your crossover or your ports, now is the time to do so!
Step 8: The finishing touches.

Here’s where you match great sounding speakers to great looking speakers! There is an abundance of choices in how you’d like to finish your speakers, from painting to staining in a variety of colours/ finishes. A classic mahogany wood stain finish or a modern gloss white, choose something that fits your style and take your time on this step – don’t rush through it. The outer appearance of your speaker gives off an impression to others, why not let it reflect all the hard-work and time taken to build the inside? It’s easy to rush through this step when caught up in the excitement of it all, but again, you really do want to take your time here. Give your speakers the TLC they deserve and finish them off correctly – You’ll regret it if you don’t, trust me on this one!
Wrapping Up
There are so many ways (or opinions) on how to build your own speakers. Some might agree with the methods I’ve mentioned above, and others might not. The reality is, there is no single “right way” to build speakers. So, gather a few different opinions and decide which best suits your budget and your needs. The worst that can happen is you make a mistake but learn more than you expected to learn! Most importantly, have fun!
If you’ve built your own speakers and learned some hard lessons or nifty tricks along the way, please feel free to share in the comment section below. We’d love to hear your tips or if there’s anything you’d do differently (and why!).

